ISSR CLASSES
Checkpoint Science
iGCSE Chemistry
iGCSE Physics
iGCSE Coordinated Science
A-Level Chemistry
PRACTICALS
Practicals Home
Practicals A-Z
Study Plan for Practical Work
Traditionally pipettes were filled by sucking directly with the mouth. Mouth pipetting is no longer allowed for safety reasons. You will need to use a pipette filler. There are two common types in use. Both need to be fitted to the top of the pipette. This is done with light pressure only - they must not be forced onto the pipette. If your pipette filler does not suck up liquid, with a small twist try to push it on very slightly more. If it still does not work, your pipette filler is probably broken - put it aside and get another one. If you force your pipette filler and the stem snaps, there could be a very nasty accident. The broken pipette end is long, narrow and very sharp, and you are forcing your hand down on it - you don't need a lot of imagination! Try to avoid overfilling the pipette, such that liquid enters the pipette filler. This will damage the filler, and is also hazardous as future students will find it sprays out unknown liquids. The easiest way to overfill a pipette is to take the tip out of the liquid. It then fills rapidly with air, and any liquid already in it shoots upwards. Make sure that the tip is well below the surface of the liquid.

|
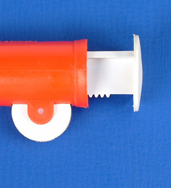
To use the type A filler (also known as a pi pump) attach it lightly to the pipette and place the pipette tip under the surface of the liquid. Rotate the knob and liquid will be sucked up into the pipette. Fill it to around a couple of centimetres above the mark. Pressing lightly on the lever allows air into the top and the liquid level falls. You will need to do this carefully to ensure that the pipette is correctly filled, with the bottom of the meniscus just touching the line. If you go too far you will need to suck up more liquid and start again. when it is correctly filled, transfer the pipette to the container which is to receive the liquid (probably a conical flask). Press the lever fully to empty the pipette. When no more liquid leaves the pipette, just touch the tip below the surface of the liquid and then withdraw it. |
|
|
|
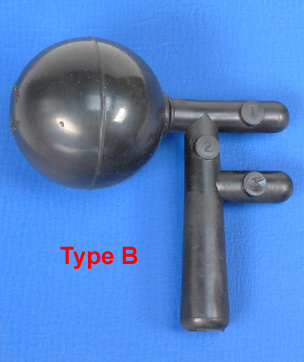
The type B filler sometimes confuses students. Try not to memorize what the buttons (valves) do, but look where they are and work out what they do. First put the filler onto the pipette, remembering not to attach it too tightly. Press button 1 (as this allows the air from the bulb to go into the surroundings) and squash the bulb to expel some of the air. Release button 1, stop squashing the bulb and now press button 2. This joins the bulb to the top of the pipette, so the bulb sucks liquid up the pipette as it expands. Fill the pipette about a couple of centimetres above the mark and release button 2. Finally, button 3 lets air from the surroundings into the top of the pipette so that the liquid level falls. Press this button gently until the top of the meniscus just touches the line on the pipette. The pipette is now transferred to the container which is to receive the liquid (probably a conical flask). Press button 3 fully to empty the contents into the flask. When no more liquid leaves the tip, just touch the tip below the surface of the liquid and then withdraw it. |