ISSR CLASSES
Checkpoint Science
iGCSE Chemistry
iGCSE Physics
iGCSE Coordinated Science
A-Level Chemistry
PRACTICALS
Practicals Home
Practicals A-Z
Study Plan for Practical Work
|
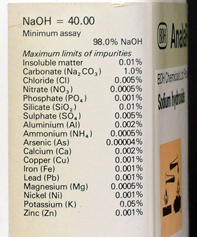
We use a titration to measure the unknown concentration of a solution. There are many situations in which it is important to make such a measurement. For example, it might be used to check the purity of a supplied chemical or to measure the level of impurity of a particular substance in a foodstuff. A titration involves careful measurement of the volumes of the solutions used, so is also known as volumetric work. |
|
|
|
The basic principle is to react the unknown solution with another solution of precisely known concentration. The known concentration solution is known as a standard solution, and can be made up carefully in the laboratory or bought in from a chemical supplier. The standard solution is known as the titrant. If we know the exact volumes of the two solutions required to react exactly, and the equation for the reaction, we can calculate the concentration of the solution we are measuring. An indicator may be required to show when the two solutions have just reacted together. The most common titrations carried out at "A" Level are acid-alkali titrations and redox titrations. |
|
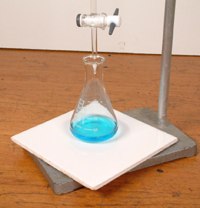
The principle behind all these titrations is the same. One of the solutions (usually the one of known concentration) is placed in a prepared burette. Make sure you check the burette link, as its correct use is an important part of any titration. A white tile placed at the bottom of the burette stand will make the colour change of the indicator much easier to see. |
|
An exact volume of the other solution (usually the one of unknown concentration) is measured out accurately with a pipette into a cleaned conical flask. Make sure you check the pipette link - it is another crucial part of the titration process. We usually pipette 10 cm3 or 25 cm3 into a 100 cm3 or 250 cm3 conical flask. Make sure the flask has plenty of room, as we are going to swirl it vigorously and don't want to lose any of the contents.
The flask is cleaned out with distilled water and does not need to be dried. This sometimes worries students, as they quite correctly point out that the water will dilute the solution that we are adding to it. However, as we shall see in the calculation, we are only interested in the number of moles of the substance. This does not change by adding water - the solution is more dilute, but there's more of it. Cleaning the flask with the solution it is to contain would make accurate pipetting pointless, as an additional (unknown) volume of solution would be present. At this point three or four drops of an appropriate indicator are added.
|
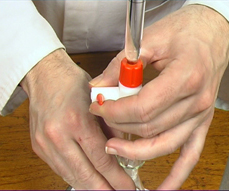
We are now ready to start our titration. It is important that the mixture is well mixed and you will have to get used to the technique. If you are right handed, use your right hand to swirl the flask. Your left hand controls the tap. You should have the burette scale facing you, so your hand will have to curl around the burette in order to reach the tap. Open the tap to allow the titrant into the flask and swirl continuously. |
|
When the indicator colour changes, close the tap promptly. This first titration will be a rough one (or range finder). It will almost certainly go past the end-point (the end of the titration when the indicator colour first permanently changes). It will, however, give an idea of the point of change. In subsequent titrations the titrant is added rapidly up to about 1 cm3 before your rough value, and then drop by drop until the end-point is reached. The end-point should be accurate to the nearest drop. A note is made of the end volume reading on the burette.
|
|
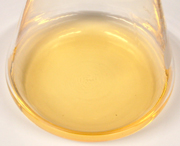
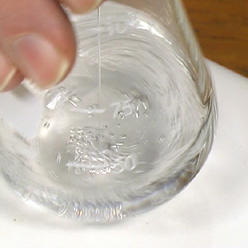
With practice you may get an accurate first titration value. When the titrant is first added there is little change to the original colour of the indicator (see picture to the left). As you get nearer to the end point the final indicator colour becomes more apparent and will take some swirling to discharge (place mouse over picture to the left). When this point is reached you know to slow down the rate of addition. It is also good practice, at this point, to use a little distilled water from a wash bottle to wash down the inside walls of the conical flask. |
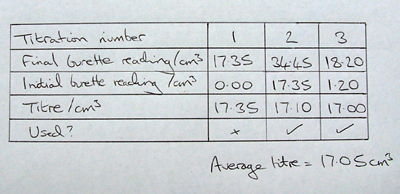
The difference between the start and end readings can be calculated and is known as the titre. You should repeat your titration until you get at least two concordant titres. This means that they should differ by no more than 0.10 cm3. Widely varying titres will indicate to your assessor that you have poor technique.
The following video shows an acid-alkali titration using phenolphthalein indicator. The end-point is the first permanent pink colour. The use of a pipette and a burette is an essential part of a titration and you will have to check these links in order to be able to do the complete process.
Video - carrying out a titration
|
Make sure that you present your results clearly and to an appropriate number of significant figures. All that's left to do now is the calculation! |
|
Incorrect cleaning. The pipette and burette should be washed out with the solutions that they are going to contain. The conical flask should be washed out with distilled water.
Incorrect use of pipette. See pipette errors.
Incorrect use of burette. See burette errors.
Too much indicator added. About three drops is ideal. Acid-base indicators are usually weak acids - adding too much may affect the titre.
Inefficient mixing. The flask should be continuously swirled using your dominant hand, whilst your other hand controls the burette tap. Care must be taken not to break the burette jet.
Going past the end-point. You must find the end-point to the nearest drop. This means that towards the end of the titration you must be adding the titrant one drop at a time. Students often add squirts of liquid rather than drops. Not only will this be spotted by your teacher during assessment, but it will lead to very poor results.
No use of white tile. This makes it much easier to spot the end-point.
Inconsistent results. Good answers should be consistent and agree to the nearest 0.1 cm3. If your answers differ by more than 0.2 cm3, you should do more titrations and discard the answers which you think are incorrect. Any of the above errors will contribute to inconsistent results.