ISSR CLASSES
Checkpoint Science
iGCSE Chemistry
iGCSE Physics
iGCSE Coordinated Science
A-Level Chemistry
PRACTICALS
Practicals Home
Practicals A-Z
Study Plan for Practical Work
Qualitative observation
Qualitative simply means you will be describing things rather than making any measurements.
Making the observations
A number of experiments involve doing some simple chemical reactions and making observations of them.
These are usually fairly simple and to the point. Remember that you can only be given credit for what you write down. Students often perform poorly on these practicals because they miss out details (or sometimes entire questions!). Check that you have answered each part of the question from the instructions that you have been given. Make sure your results are clearly marked as the answer to a particular part of the question. Don't forget to describe the starting materials as well as any changes.
The major loss of marks for these exercises is not incorrect observations, but missing or incomplete observations. If in doubt, include a detail. Always describe COLOUR and STATE (solid, liquid, gas, solution).
Don't forget that observations are not just what you can see - you can also smell, hear and feel temperature changes.
Always give reactions plenty of time. The reaction may be slow or a second change may take place which you fail to notice.
|
|
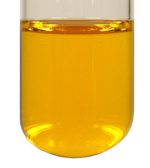
There are not many details that you can observe in a chemical reaction. It may be that nothing appears to happen, and this is a valid observation. Colour changes are common in chemistry. You must always write down the starting colour and the final colour. For example, purple to colourless or orange to green. Try to stick to simple, unambiguous descriptions of colours - blue-green is better than aqua green. |
Although it is very poor science, the next piece of advice may improve your results! Proper observation should not be affected by what you are expecting to happen. However, observation exercises are marked using a strict mark scheme. For example, on reduction, acidified sodium dichromate changes from orange to green. If you do an exercise with it, there are only two likely results. Either it does nothing, or it turns from orange to green. In reality, it can look more blue than green. However, if you put blue or turquoise you may not get the mark. Similarly, acidified potassium manganate(VII) turns from purple to colourless on reduction. However, without enough acid it may go brown. When it is essentially colourless, I have seen it described as grey or yellow - no marks! The next table gives some typical colour changes. Always describe the colour change you see, but if the following is a reasonable description, use it!
|
Reagent |
typical colour change |
|
|
Acidified sodium dichromate |
orange to green |
|
|
Acidified potassium manganate(VII) |
purple to colourless |
|
|
Alkaline potassium manganate(VII) |
purple to green |
|
|
Bromine water |
orange or yellow to colourless |
|
Temperature change is an observation that many people forget to make. Did it get hot or cold? We are generally not concerned with very small changes - you should be able to feel any change by touch. |
|
Occasionally you may have a sound to describe. Some crystals crackle when heated (this is known as decrepitation) and hydrogen burns with a squeaky pop.
|
|
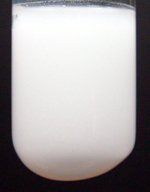
Change of state is another important observation. A solid that is produced from a solution is called a precipitate, but you may not actually see lumps of solid. If the precipitate is fine, the solution will look cloudy and it may take some time for it to settle to the bottom of the test tube. Hold the test tube up to the light. If you can't see through it, this is a precipitate. Look for particles of solid on the upper surfaces of the glass. Students often leave the precipitate description out, saying something like "it went white". This will only get 1 mark for the colour. It's often worth hanging on to your reaction mixture as any precipitate will usually settle after a few minutes and become much more obvious. Keep the test tube in a test tube rack and make sure you have labelled it, so that it doesn't get mixed up with some other observation. |
The reverse change is often missed. If a precipitate disappears to form a clear (it may be coloured) solution, then state that the precipitate dissolves. If no change occurs on adding an acid, for example, then state that the precipitate was insoluble in acid.
|
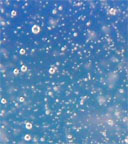
You may see bubbles of a gas produced in a liquid reaction. This is called effervescence. Don't forget to describe the colour of the gas. This is nearly always forgotten where the gas is colourless. |
|
|
|
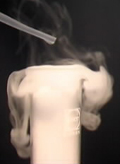
Gases can be seen through. Chlorine is a pale green gas. If you look at a gas jar containing it, it is pale green but it is clear. You will never see a white gas. Such things often appear on films described as gases, but they are not. If you think you have a white gas, look again - you can't see through it. It will either be very fine solid particles (known as a white smoke) or very fine liquid droplets (known as white fumes). |
There may be a smell to describe. Always smell things very cautiously and use descriptions that other people can recognize. One young student once made the description of a particular chemical as "smells like my grandad". This may well have been true, but didn't help anyone who didn't know grandad!
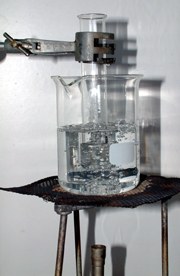
If you are asked to test solubility in water, don't use too much solid. Even very soluble substances have a limit to their solubility. Using about 5 cm3 of water in a test tube you should only add a small (around 2 mm in height) spatula measure of solid. Similarly, avoid using large quantities of test reagents like bromine water, particularly when testing for gases. If a test tube of gas is half-filled with bromine water there may be insufficient gas to fully react with the bromine. Consequently, only a partial colour change takes place, and the observation is not the expected one. Use just enough reagent to be able to clearly see any colour change (about 1 cm depth is ideal). You may be asked to heat your reaction mixture in a water bath.
|
|
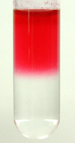
Always ensure that chemicals added to the test tube are mixed by thorough shaking. Mixing in test tubes can be quite poor. It can appear that two separate layers have formed, but the reality is just that they have not mixed. You can always use a glass rod to stir gently. If you do this, be careful as the test tube can break quite easily. Also, ensure you clean and dry the glass rod if you intend to mix another test tube with it in order to prevent contamination. |
Simple descriptions are all that is needed. When asked to describe the combustion of a solid some students write around half a page. There are probably only a couple of marks going. You should be able to make your description in one or two sentences at most. Make sure that your results are presented in a clear and easy to read manner - a simple table is a good way of presenting results.
Watch the following video which contains 10 small clips. Describe all the changes you can see and then check your observations using the link below. Obviously, you will not be able to check for any temperature changes or smells.
You might like to check through the section on halogens. This is quite a popular topic for observation exercises.
Making deductions
You will also be expected to work out the identity of substances from the results of the tests. You may be asked to write down some simple equations for the reactions that you have seen. A lot of the reactions may be asked to carry out will be found on this DVD in the various videos. Looking through the disk and gaining familiarity will make your observations and deductions much easier.
It is important that you are very familiar with all the chemical tests that are needed for the AS course. Take a look through them now:
Example 1 (Inorganic)
Divide the sample of white powder into three portions. Carry out a flame test on one of the portions. [result - orange-yellow flame]
Dissolve the second portion in distilled water and add an equal portion of dilute nitric acid followed by a few drops of silver nitrate solution. [result - yellow precipitate]
In a fume cupboard add 1 cm3 of concentrated sulfuric acid to the final portion. [result - grey-black solid and steamy fumes produced]
Try to work out the identity of the white powder. Check your answer here.
Example 2 (Organic)
Put 3 cm depth of the liquid into a boiling tube and bring to the boil in a water bath. Measure its boiling point. [result boils at 79 ºC]
In a fume cupboard add a small spatula measure of phosphorus pentachloride to 1 cm depth of the liquid in a test tube. [result - rapid effervescence. Gas produces white smoke with ammonia gas]
Add three drops of the liquid to a boiling tube containing cm3 of dilute sulfuric acid and a few drops of sodium dichromate(VI) solution. Just bring to the boil. [Result orange to green colour change]
Using a data book as a source of data try to identify the liquid. Check your answer here.